- ТхЈУДѕ: 666819 ТгА
-

ТќЄуФатѕєу▒╗
уцЙтї║уЅѕтЮЌ
- ТѕЉуџёУхёУ«» ( 0)
- ТѕЉуџёУ«║тЮЏ ( 0)
- ТѕЉуџёжЌ«уГћ ( 0)
тГўТАБтѕєу▒╗
- 2011-11 ( 24)
- 2011-10 ( 43)
- 2011-09 ( 47)
- ТЏ┤тцџтГўТАБ...
ТюђТќ░У»ёУ«║
-
xiaoge0635№╝џ
ca0dbd3e7ecda67afa21f0b8f2bcf60 ...
OracleуЏИтЁ│уЪЦУ»єуѓ╣тЁ│жћ«У»Ї -
xiaoge0635№╝џ
oracle тГЌугдСИ▓ Тјњт║Јoracle Тјњт║ЈТЁбoracle тЉй ...
OracleуЏИтЁ│уЪЦУ»єуѓ╣тЁ│жћ«У»Ї -
ZY199266№╝џ
жЌ┤тєЎСИфтЪ║С║јpid тњї confуџё... У┐ЎТаит░▒УЃйТћ»ТїЂтцџphp- ...
у«ђтЇЋуџёserviceу╝ќтєЎ nginx php-fpm -
ZY199266№╝џ
85c09153a7a256d951eae08e39d32уЪЦУ»є ...
у«ђтЇЋуџёserviceу╝ќтєЎ nginx php-fpm -
ZY199266№╝џ
С║јpid тњї confуџё... У┐ЎТаит░▒УЃйТћ»ТїЂтцџphp-fpm ...
у«ђтЇЋуџёserviceу╝ќтєЎ nginx php-fpm
ASIHTTPRequestтњїlibxmlу╗Њтљѕ№╝їт«ъуј░УЙ╣У»иТ▒ѓУЙ╣УДБТъљ
У┐ЎТХЅтЈітѕ░3 Тќ╣жЮбуџётЁ│жћ«уЪЦУ»є№╝џ
┬ЦASIHTTPRequest
У┐ЎжЃетѕєуџётєЁт«╣тЈ»С╗ЦтЈѓУђЃСйюУђЁтЈдСИђу»ЄтЇџТќЄсђіASIHTTPRequestуџёСй┐ућесђІсђѓ
┬ЦNSOperation тњї Libxml
У┐ЎжЃетѕєтєЁт«╣тюеСйюУђЁуџёСИђу»ЄтЇџТќЄсђіСй┐ућеNSOperationт«ъуј░т╝ѓТГЦСИІУййсђІСИГС╣ЪТюЅС╗Іу╗Їсђѓ
УЃїТЎ»уЪЦУ»єти▓у╗ЈтЁитцЄ№╝їСИІжЮбУ«ЕТѕЉС╗гу╗Ду╗Гсђѓ
СИђсђЂтЄєтцЄlibxmlуј»тбЃ
libxml2 Тў»СИђСИфт╝ђТћЙТ║љуаЂт║Њ№╝їж╗ўУ«цТЃЁтєхСИІiPhone SDK СИГти▓у╗ЈтїЁТІгтюетєЁсђѓ т«ЃТў»СИђСИфтЪ║С║ј C уџё API№╝їТЅђС╗ЦтюеСй┐ућеСИіТ»ћ cocoa уџёNSXML УдЂж║╗уЃдУ«Итцџ№╝ѕСИђуДЇу▒╗С╝╝ c тЄйТЋ░уџёСй┐ућеТќ╣т╝Ј№╝Ѕ№╝їСйєТў»У»Цт║ЊтљїТЌХТћ»ТїЂ DOM тњї SAX УДБТъљ№╝їтЁХУДБТъљжђЪт║дУЙЃт┐Ф№╝їУђїСИћтЇаућетєЁтГўт░Ј№╝їТў»ТюђжђѓтљѕСй┐ућетюе iphone СИіуџёУДБТъљтЎесђѓ С╗јТђДУЃйСИіУ«▓№╝їТЅђТюЅуЪЦтљЇуџёУДБТъљтЎеСИГ№╝їTBXML Тюђт┐Ф№╝їСйєтюетєЁтГўтЇаућеСИі№╝їlibxml Сй┐ућеуџётєЁтГўт╝ђжћђТў»Тюђт░ЈуџёсђѓтЏаТГц№╝їТѕЉС╗гтє│т«џСй┐уће libxml уџёsaxТјЦтЈБсђѓ
ждќтЁѕ№╝їТѕЉС╗гжюђУдЂтюеproject СИГт»╝тЁЦ framework№╝џlibxml2.dylibсђѓ
УЎйуёХlibxml Тў» sdk СИГУЄфтИдуџё№╝їСйєт«Ѓуџётц┤ТќЄС╗ХтЇ┤ТюфТћЙтюеж╗ўУ«цуџётю░Тќ╣№╝їтЏаТГцУ┐ўжюђУдЂТѕЉС╗гУ«Йуй« project уџё build жђЅжА╣№╝џHEADER_SEARCH_PATHS = /usr/include/libxml2№╝їтљдтѕЎ libxml т║ЊСИЇтЈ»ућесђѓ
уёХтљј№╝їТѕЉС╗гт░▒тЈ»С╗ЦтюеТ║љС╗БуаЂСИГ#import<libxml/tree.h>С║єсђѓ
УЄ│С║јASIHTTPRequest уџёСй┐ућеуј»тбЃ№╝їУ»итЈѓУђЃсђіASIHTTPRequestуџёСй┐ућесђІУ┐ЏУАїсђѓ
С║їсђЂу║┐уеІу«Ауљє
ждќтЁѕ№╝їТѕЉС╗гУѓ»т«џУдЂСй┐ућеу║┐уеІТЮЦУ┐ЏУАїт«ъуј░сђѓтцџу║┐уеІуџёТЊЇСйюСй┐ућеNSOperationтГљу▒╗сђѓ
Тќ░т╗║o-c class№╝їтЉйтљЇСИ║SyncRequestParseOperation№╝їт«Ѓт┐Ёжюђу╗ДТЅ┐NSOperationсђѓ
ТѕЉС╗гтє│т«џСИЇСй┐ућеу╗ДТЅ┐УђїСй┐ућеУЂџтљѕТЮЦУ«Ет«ЃтљїТЌХтЁиТюЅASIHTTPRequest тњї Xml УДБТъљуџётіЪУЃй№╝їтЏаТГцТѕЉС╗гт»╝тЁЦС║єlibxml/tree.h тњї ASIHTTPRequest.h сђѓ
ућ▒С║јТюЇтіАтЎеСй┐ућеС║єGBK у╝ќуаЂ№╝їТЅђС╗ЦТѕЉС╗гС╣ЪСй┐ућеС║єNSStringEncodingсђѓkRequestStatusт«џС╣ЅС║єСИђСИфТъџСИЙ№╝їућеТЮЦУАеуц║SyncRequestParseOperationуџёСИЇтљїуіХТђЂ№╝џУ»иТ▒ѓт«їТ»ЋсђЂУ»иТ▒ѓтц▒У┤ЦсђЂТћХтѕ░ТЋ░ТЇ«тїЁсђѓУ┐Ў3уДЇтЈ»УЃйуіХТђЂС╝џУбФТѕљтЉўтЈўжЄЈ status Сй┐уће№╝їт«ъжЎЁСИіт«ЃТў»СИфintсђѓтц┤ТќЄС╗Хт«џС╣ЅтдѓСИІ№╝џ
#import<libxml/tree.h>
#import"BaseXmlParser.h"
#import"ASIHTTPRequest.h"
enumkRequestStatus{
kRequestStatusFinished,
kRequestStatusFailed,
kRequestStatusDataReceived
};
@interfaceSyncRequestParseOperation : NSOperation
{
NSURL*_url;
NSDictionary*_data;
//Тъёт╗║gb2312уџёencoding
NSStringEncodingenc;
//XmlУДБТъљтЎеТїЄжњѕ
xmlParserCtxtPtr_parserContext;
BaseXmlParser*baseParser;
iddelegate,progressDelegate;
intstatus;
}
@property(nonatomic,retain) NSDictionary *data;
@property(nonatomic,retain) NSURL *url;
@property(assign)intstatus;
- (id)initWithURLString:(NSString*)urlxmlParser:(BaseXmlParser*) parser delegate:(id)obj;
-(void)setProgressDelegate:(id)progress;
-(void)statusChangedNotify;
@end
BaseXmlParser Тў»СИђСИфXmlУДБТъљтЎеуџётЪ║у▒╗№╝їТѕЉС╗гСй┐ућет«ЃуџётГљу▒╗ТЮЦУ┐ЏУАїXmlУДБТъљ№╝їтюетЁХСИГт«џС╣ЅС║єСИђС║ЏСй┐уће libxml ТЌХуЅ╣ТюЅуџёу╗ЊТъёСйЊтњїтЄйТЋ░тБ░ТўјсђѓТюЅС║єт«Ѓ№╝їТѕЉС╗гт░▒тЈ»С╗ЦтюетЁХтГљу▒╗СИГУдєуЏќТЪљС║ЏТќ╣Т│ЋТЮЦУДБТъљтљёуДЇСИЇтљїуџёXML ТќЄС╗Хсђѓ
BaseXmlParser тЈітЁХтГљу▒╗ТѕЉС╗гтљјжЮбС╝џС╗Іу╗Їсђѓ
delegateтњї progressDelegate С┐ЮтГўСИцСИфт»╣У▒Ауџё id т╝ЋућесђѓтЅЇУђЁТў»У┤ЪУ┤БтЊЇт║ћSyncRequestParseOperationу▒╗уџёСИђС║ЏуЅ╣Т«іуџёжђџуЪЦТХѕТЂ»№╝їТ»ћтдѓТЪљСИфуіХТђЂуџёТћ╣тЈў№╝ЏтљјУђЁУ┤ЪУ┤БТа╣ТЇ«ТћХтѕ░уџёТЋ░ТЇ«т«ъТЌХУ┐ЏУАїУ┐Џт║дТўЙуц║сђѓ
ТјЦСИІТЮЦТѕЉС╗гуюІт«ъуј░№╝їждќтЁѕТў»тѕЮтДІтїќinit Тќ╣Т│Ћ№╝џ
initWithURLString:xmlParser: delegate:(id)objТќ╣Т│ЋТў»СИфСЙ┐тѕЕуџётѕЮтДІтїќТќ╣Т│Ћ№╝їтѕєтѕФт»╣3СИфТѕљтЉўУ┐ЏУАїтѕЮтДІтїќ№╝їУђїСИЇт┐ЁУдЂт»╣т«ЃС╗гСИђСИђУ░ЃућеsetterТќ╣Т│Ћ№╝џhttpУ»иТ▒ѓтю░тЮђurlсђЂУДБТъљтЎесђЂжђџуЪЦТХѕТЂ»уџётДћТЅўт»╣У▒Асђѓ
- (id)initWithURLString:(NSString*)urlxmlParser:(BaseXmlParser*)parser delegate:(id)obj{
if(self= [superinit]) {
_url=[[NSURLalloc]initWithString:url];
delegate=obj;
baseParser=[parserretain];
//Тъёт╗║gb2312уџёencoding
enc=CFStringConvertEncodingToNSStringEncoding(kCFStringEncodingGB_18030_2000);
}
returnself;
}
жЎцС║єinitТќ╣Т│Ћтцќ№╝їТѕЉС╗гС╣ЪТЈљСЙЏС║є setProgressDelegate Тќ╣Т│Ћ№╝џ
-(void)setProgressDelegate:(id)progress{
progressDelegate=progress;
}
ућеС║јт»╣progressDelegate У┐ЏУАїтѕЮтДІтїќсђѓ
ТјЦСИІТЮЦТў»ТюђСИ╗УдЂуџёжЃетѕє№╝їNSOperationуџёућЪтЉйтЉеТюЪТќ╣Т│Ћ№╝џ
#pragma mark NSOperationуџёућЪтЉйтЉеТюЪТќ╣Т│Ћ
//т╝ђтДІу║┐уеІ-Тюгу▒╗уџёСИ╗Тќ╣Т│Ћ
- (void)start {
NSLog(@"operation start!");
if(![selfisCancelled]) {
//тѕЏт╗║XMLУДБТъљтЎеТїЄжњѕ
_parserContext=xmlCreatePushParserCtxt(&_saxHandlerStruct,baseParser,NULL,0,NULL);
//С╗Цт╝ѓТГЦТќ╣т╝ЈтцёуљєС║ІС╗Х№╝їт╣ХУ«Йуй«С╗БуљєтЮЌ
__blockASIHTTPRequest*request = [ASIHTTPRequestrequestWithURL:_url];
//У«Йуй«У┐Џт║дС╗Буљє
if(progressDelegate!=nil) {
[requestsetDownloadProgressDelegate:progressDelegate];
}
//Сй┐ућеcompleteтЮЌ№╝їтюеСИІУййт«їТЌХтЂџСИђС║ЏС║ІТЃЁ
[requestsetCompletionBlock:^(void){
[selfsetStatus:kRequestStatusFinished];
NSLog(@"request completed!");
//Ти╗тіаУДБТъљТЋ░ТЇ«№╝ѕу╗ЊТЮЪ№╝Ѕ№╝їТ│еТёЈТюђтљјСИђСИфтЈѓТЋ░terminate
xmlParseChunk(_parserContext,NULL,0,1);
//Ти╗тіаУДБТъљТЋ░ТЇ«№╝ѕу╗ЊТЮЪ№╝Ѕ№╝ї
if(baseParser!=nil){
[selfsetData:[[baseParsergetResult]copy]];
}else{
NSLog(@"baseparser is nil");
}
//жЄіТћЙXMLУДБТъљтЎе
if(_parserContext) {
xmlFreeParserCtxt(_parserContext),_parserContext=NULL;
}
[selfstatusChangedNotify];
}];
//Сй┐ућеfailedтЮЌ№╝їтюеСИІУййтц▒У┤ЦТЌХтЂџСИђС║ЏС║ІТЃЁ
[requestsetFailedBlock:^(void){
[selfsetStatus:kRequestStatusFailed];
NSLog(@"request failed !");
//жЄіТћЙXMLУДБТъљтЎеТїЄжњѕ
if(_parserContext) {
xmlFreeParserCtxt(_parserContext),_parserContext=NULL;
}
[selfstatusChangedNotify];
}];
//Сй┐ућеreceivedтЮЌ№╝їтюеТјЦтЈЌтѕ░ТЋ░ТЇ«ТЌХтЂџСИђС║ЏС║ІТЃЁ
[requestsetDataReceivedBlock:^(NSData*data){
[selfsetStatus:kRequestStatusDataReceived];
NSLog(@"received data:%d",data.length);
//Ти╗тіаУДБТъљТЋ░ТЇ«№╝ѕу╗ЊТЮЪ№╝Ѕ№╝їТ│еТёЈТюђтљјСИђСИфтЈѓТЋ░terminate
if(baseParser!=nil&&baseParser!=NULL){
[selfsetData:[[baseParsergetResult]copy]];
}else{
NSLog(@"baseparser is nil");
}
//Сй┐ућеlibxmlУДБТъљтЎеУ┐ЏУАїxmlУДБТъљ
xmlParseChunk(_parserContext, (constchar*)[databytes], [datalength],0);
[selfstatusChangedNotify];
}];
[requeststartAsynchronous];
}
}
//тЂюТГбу║┐уеІ
- (void)cancel
{
[supercancel];
}
т»╣С║јСИђСИфNSOperation ТЮЦУ»┤№╝їТюђСИ╗УдЂуџёТў»start Тќ╣Т│Ћ№╝їтЏаСИ║у║┐уеІтюеУ┐ЎжЄїтљ»тіесђѓућ▒С║јСй┐ућеС║є ASIHTTPRequest уџёт╝ѓТГЦТќ╣т╝Ј№╝їТЅђС╗ЦтюеstartТќ╣Т│ЋСИГТѕЉС╗гТ▓АТюЅСй┐ућеNSRunLoopтЙфуј»№╝ѕУ┐ЎСИфжЌ«жбўтЈѓУђЃhttp://www.cocoabuilder.com/archive/cocoa/279826-nsurlrequest-and-nsoperationqueue.html №╝ЅсђѓтЏаСИ║ ASIHTTPRequest уџёstartAsynchronous Тќ╣Т│ЋТЈљСЙЏС║єжбЮтцќуџёу║┐уеІсђѓТѕЉС╗гтюе start Тќ╣Т│ЋСИГСй┐ућеС║єСИђСИфASIHTTPRequest №╝їтѕЕуће BaseXmlParser УДБТъљтЎеТЮЦТЈљСЙЏСИђу│╗тѕЌугдтљѕ libxml УДёУїЃуџётЏъУ░ЃтЄйТЋ░№╝їС╗ЦтЊЇт║ћ sax УДБТъљС║ІС╗ХсђѓтйЊуёХ№╝їућ▒С║јТѕЉС╗гУдЂт«ъуј░РђюУЙ╣ТјЦТћХТЋ░ТЇ«№╝їУЙ╣УДБТъљXmlРђЮуџёуЏ«уџё№╝їТѕЉС╗гтюе ASIHTTPRequest уџёСИЅСИфтДћТЅўтЮЌСИГ№╝їт░▒т»╣ТЋ░ТЇ«У┐ЏУАїС║єтцёуљє№╝ѕСй┐уће libxml уџётЄйТЋ░№╝Ѕсђѓ
Т»ћУЙЃТђфт╝ѓуџёТў»т»╣ASIHTTPRequest уџё3СИфС║ІС╗ХтДћТЅўСИГСй┐ућеС║єтЮЌУ»ГТ│Ћ№╝їтЮЌУ»ГТ│ЋС╗Іу╗ЇтЈ»С╗ЦтЈѓУђЃСйюУђЁтЈдСИђу»Є№╝ѕу┐╗У»Љ№╝ЅтЇџТќЄсђітЮЌу╝ќуеІТїЄтЇЌсђІсђѓ
СИ║С║єТіі3СИфтДћТЅўС║ІС╗ХжђџуЪЦу╗Ўdelegate№╝їТѕЉС╗гжюђУдЂтюе3СИфС║ІС╗ХтДћТЅўтЮЌСИГУ░Ѓућеdelegate уџёуЏИт║ћТќ╣Т│Ћ№╝џ
// statusуіХТђЂтЈўтїќжђџуЪЦ
-(void)statusChangedNotify{
if(delegate!=nil) {
SELsel=NSSelectorFromString(@"syncRequestParseStatusNofity:");
if([delegaterespondsToSelector:sel]){
[delegateperformSelector:selwithObject:self];//Т│еТёЈтєњтЈиУ»┤ТўјтИд1СИфтЈѓТЋ░
}
}
}
СИ║С║єу«ђСЙ┐№╝їТѕЉТ▓АТюЅт«џС╣ЅТќ░уџётЇЈУ««№╝їУђїтЈфТў»Сй┐ућеТќ╣Т│ЋтљЇsyncRequestParseStatusNofity:СйюСИ║тєЁжЃетЇЈУ««сђѓтдѓТъюdelegateУдЂТЃ│ТјЦТћХжђџуЪЦ№╝їт░▒т┐Ёжюђт«ъуј░У»ЦТќ╣Т│ЋсђѓСйюСИ║СИђуДЇТіђтиД№╝їтЁХСИГСй┐ућеС║єтЈЇт░ёТю║тѕХ№╝їжЂ┐тЁЇУ┐љУАїТЌХжћЎУ»»сђѓ
СИЅсђЂSax т╝ѓТГЦУДБТъљ
libxml Тў»CтЄйТЋ░т║Њ№╝їтЁХСИГтЙѕтцџтЄйТЋ░жюђУдЂСй┐ућеС╗цС║║ућЪуЋЈуџёу╗ЊТъёСйЊт«џС╣ЅсђѓСИ║С║єСЙ┐С║јТЅЕт▒Ћ№╝їУ┐ЎС║Џт«џС╣ЅУбФТћЙтѕ░С║є BaseXmlParser у▒╗СИГ№╝џ
#import<Foundation/Foundation.h>
#import<libxml/tree.h>
@interfaceBaseXmlParser : NSObject {
NSStringEncodingenc;
NSMutableDictionary*_root;
}
// Property
- (void)startElementLocalName:(constxmlChar*)localname
prefix:(constxmlChar*)prefix
URI:(constxmlChar*)URI
nb_namespaces:(int)nb_namespaces
namespaces:(constxmlChar**)namespaces
nb_attributes:(int)nb_attributes
nb_defaulted:(int)nb_defaultedslo
attributes:(constxmlChar**)attributes;
- (void)endElementLocalName:(constxmlChar*)localname
prefix:(constxmlChar*)prefix URI:(constxmlChar*)URI;
- (void)charactersFound:(constxmlChar*)ch
len:(int)len;
-(NSDictionary*)getAtributes:(constxmlChar**)attributes withSize:(int)nb_attributes;
-(NSDictionary*)getResult;
@end
//3СИфжЮЎТђЂТќ╣Т│Ћуџёт«ъуј░№╝їтЁХт«ъТў»У░ЃућеС║єctxуџёТѕљтЉўТќ╣Т│Ћ№╝їтЁХСИГctxтюе_parserContextтѕЮтДІтїќТЌХС╝атЁЦ
staticvoidstartElementHandler(
void* ctx,
constxmlChar* localname,
constxmlChar* prefix,
constxmlChar* URI,
intnb_namespaces,
constxmlChar** namespaces,
intnb_attributes,
intnb_defaulted,
constxmlChar** attributes)
{
[(BaseXmlParser*)ctx
startElementLocalName:localname
prefix:prefixURI:URI
nb_namespaces:nb_namespaces
namespaces:namespaces
nb_attributes:nb_attributes
nb_defaulted:nb_defaulted
attributes:attributes];
}
staticvoidendElementHandler(
void* ctx,
constxmlChar* localname,
constxmlChar* prefix,
constxmlChar* URI)
{
[(BaseXmlParser*)ctx
endElementLocalName:localname
prefix:prefix
URI:URI];
}
staticvoidcharactersFoundHandler(
void* ctx,
constxmlChar* ch,
intlen)
{
[(BaseXmlParser*)ctx
charactersFound:chlen:len];
}
//libxmlуџёxmlSAXHandlerу╗ЊТъёСйЊт«џС╣Ѕ№╝їтЄАТў»УдЂт«ъуј░уџёhandlerтЄйТЋ░жЃйтєЎтюеУ┐ЎжЄї№╝їСИЇтЄєтцЄт«ъуј░уџёућеnullС╗БТЏ┐сђѓСИђУѕгУђїУеђ№╝їТѕЉС╗гтЈфт«ъуј░тЁХСИГ3СИфт░▒тцЪС║є
staticxmlSAXHandler_saxHandlerStruct= {
NULL,/* internalSubset */
NULL,/* isStandalone*/
NULL,/* hasInternalSubset */
NULL,/* hasExternalSubset */
NULL,/* resolveEntity */
NULL,/* getEntity */
NULL,/* entityDecl */
NULL,/* notationDecl */
NULL,/* attributeDecl */
NULL,/* elementDecl */
NULL,/* unparsedEntityDecl */
NULL,/* setDocumentLocator */
NULL,/* startDocument */
NULL,/* endDocument */
NULL,/* startElement*/
NULL,/* endElement */
NULL,/* reference */
charactersFoundHandler,/* characters */
NULL,/* ignorableWhitespace */
NULL,/* processingInstruction */
NULL,/* comment */
NULL,/* warning */
NULL,/* error */
NULL,/* fatalError //: unused error() get all the errors */
NULL,/* getParameterEntity */
NULL,/* cdataBlock */
NULL,/* externalSubset */
XML_SAX2_MAGIC,/* initializedуЅ╣Т«ітИИжЄЈ№╝їуЁДтєЎ*/
NULL,/* private */
startElementHandler,/* startElementNs */
endElementHandler,/* endElementNs */
NULL,/* serror */
};
тюеBaseXmlParser у▒╗уџётц┤ТќЄС╗ХСИГ№╝їтЈ»С╗ЦтѕєСИ║СИцжЃетѕєсђѓ
1.уггСИђжЃетѕєТў»interface т«џС╣Ѕ№╝їт«џС╣ЅС║єBaseXmlParserу▒╗уџёТѕљтЉў№╝їтїЁТІг№╝џ
┬ЦТѕљтЉўтЈўжЄЈ
enc№╝џтЪ║С║јтњїтЅЇжЮбтљїТаиуџётјЪтЏа№╝їућеС║јт«џС╣ЅGBKу╝ќуаЂсђѓ
_root№╝џСИђСИфDictionary№╝їућеС║јС┐ЮтГўУДБТъљтљјXmlт»╣У▒А№╝їСИђСИфxmlТќЄТАБтЈфТюЅСИђСИфroot тЁЃу┤а№╝їтЏаТГцућеСИђСИфDictionaryт»╣У▒АтЇ│тЈ»сђѓ
┬ЦТѕљтЉўТќ╣Т│Ћ
libxml тЏъУ░ЃТќ╣Т│Ћ№╝џтЅЇ3СИфтЙѕтЃЈТў»CУ»ГУеђтЄйТЋ░уџёТќ╣Т│ЋтЁХт«ъжЃйТў»УбФlibxmlтЏъУ░Ѓуџё№╝їт«ЃС╗гС╝џтюе3СИфжЮЎТђЂтЄйТЋ░№╝ѕтюеуггС║їжЃетѕє№╝ЅСИГУ░Ѓућесђѓ
getAttributesТќ╣Т│Ћ№╝џУ┐ЎСИфТў»СИђСИфТќ╣СЙ┐уџёУјитЈќ xml тЁЃу┤ат▒ъТђДуџёТќ╣Т│Ћсђѓућ▒С║јТюгСЙІСИГуџё XML ТќЄТАБтцДжЄЈСй┐ућеС║єт▒ъТђД№╝їТЅђС╗ЦУ┐ЎСИфТќ╣Т│ЋтЙѕт«ъућесђѓ
getResultТќ╣Т│Ћ№╝џућеС║јУјитЙЌ XML ТќЄТАБУДБТъљу╗ЊТъю№╝їтЇ│ _root т»╣У▒Асђѓ
2.уггС║їжЃетѕєТў»libxml тЏъУ░ЃтЄйТЋ░тњїу╗ЊТъёСйЊт«џС╣Ѕ№╝їтїЁТІг№╝џ
┬ЦтЏъУ░ЃтЄйТЋ░
ТюгСЙІТѕЉС╗гтє│т«џт«ъуј░3СИфтЏъУ░ЃтЄйТЋ░№╝їтѕєтѕФућеС║јтЊЇт║ћ Sax УДБТъљСИГуџё3СИфС║ІС╗Х№╝џ
тцёуљєXML тЁЃу┤ат╝ђтДІТаЄУ«░сђЂтцёуљє XML тЁЃу┤ау╗ЊТЮЪТаЄУ«░сђЂтцёуљє XML тЁЃу┤аСйЊсђѓ
СИ║С║єТЏ┤OO СИђС║Џ№╝їТѕЉС╗гТ▓АТюЅуЏ┤ТјЦтюеУ┐Ў 3 СИфтЄйТЋ░СИГтєЎт»╣т║ћуџё XML УДБТъљС╗БуаЂ№╝їУђїТў»У░ЃућеС║єу▒╗уџёТѕљтЉўТќ╣Т│ЋУ┐ЏУАїтцёуљєсђѓУ┐ЎТаи№╝їТѕЉС╗гтЈ»С╗Цтюе implement жЃетѕєтєЎтЁЦтЁиСйЊуџёС╗БуаЂсђѓ
┬Цу╗ЊТъёСйЊ
тЈфжюђУдЂтАФтЁЁСИђСИфу╗ЊТъёСйЊxmlSAXHandlerтЇ│тЈ»сђѓУ┐ЎСИфу╗ЊТъёТѕљтЉўТЋ░жЄЈС╝Ќтцџ№╝ѕ31СИф№╝Ѕ№╝їСйєТѕЉС╗гтЈфжюђтАФтЁЁСйаУдЂт«ъуј░уџётЄаСИфсђѓСЙІтдѓ№╝їТѕЉС╗гУдЂт«ъуј░3СИфтЏъУ░ЃтЄйТЋ░№╝їжѓБС╣ѕтЈфТХѕтюет»╣т║ћуџётю░Тќ╣тАФтЁЁУ┐Ў3СИфтЄйТЋ░тљЇтЇ│тЈ»№╝ѕТГцтцќТюЅСИђСИфуЅ╣Т«іуџёТѕљтЉўтЈФXML_SAX2_MAGIC№╝їСйауЁДтАФт░▒Тў»С║є№╝ЅсђѓСИ║С║єСЙ┐С║јтцДт«ХуљєУДБУ┐ЎС║ЏТѕљтЉўТЅђС╗БУАеуџёТёЈС╣Ѕ№╝їТѕЉС╗гС╣ЪтюеТЌЂУЙ╣тЂџС║єТ│ежЄі№╝їСйатЈ»С╗Цт»╣уЁДуЮђуюІсђѓ
ТјЦСИІТЮЦТў»implement №╝ѕт«ъуј░№╝Ѕсђѓ
#import"BaseXmlParser.h"
@implementationBaseXmlParser
// Property
-(id)init{
if(self=[superinit]){
//Тъёт╗║gb2312уџёencoding
enc=CFStringConvertEncodingToNSStringEncoding(kCFStringEncodingGB_18030_2000);
_root=[[NSMutableDictionaryalloc]init];
}
returnself;
}
-(void)dealloc{
[_rootrelease],_root=nil;
[superdealloc];
}
//СИђСИфСЙ┐тѕЕТќ╣Т│Ћ№╝їућеС║јУјитЈќтЁЃу┤ауџёт▒ъТђДтђ╝
-(NSDictionary*)getAtributes:(constxmlChar**)attributes withSize:(int)nb_attributes{
NSMutableDictionary* atts=[[NSMutableDictionaryalloc]init];
NSString*key,*val;
for(inti=0; i<nb_attributes; i++){
key = [NSStringstringWithCString:(constchar*)attributes[0]encoding:NSUTF8StringEncoding];
val = [[NSStringalloc]initWithBytes:(constvoid*)attributes[3]length:(attributes[4] - attributes[3])encoding:NSUTF8StringEncoding];
[attssetObject:valforKey:key];
[keyrelease],[valrelease];
attributes +=5;//ТїЄжњѕуД╗тіе5СИфтГЌугдСИ▓№╝їтѕ░СИІСИђСИфт▒ъТђД
}
returnatts;
}
//--------------------------------------------------------------//
#pragma mark -- libxml handler№╝їСИ╗УдЂТў»3СИфтЏъУ░ЃТќ╣Т│Ћ,уЕ║Тќ╣Т│Ћ№╝їуГЅтЙЁтГљу▒╗т«ъуј░--
//--------------------------------------------------------------//
//УДБТъљтЁЃу┤ат╝ђтДІТаЄУ«░ТЌХУДдтЈЉ,тюеУ┐ЎжЄїтЈќтЁЃу┤ауџёт▒ъТђДтђ╝
- (void)startElementLocalName:(constxmlChar*)localname
prefix:(constxmlChar*)prefix
URI:(constxmlChar*)URI
nb_namespaces:(int)nb_namespaces
namespaces:(constxmlChar**)namespaces
nb_attributes:(int)nb_attributes
nb_defaulted:(int)nb_defaultedslo
attributes:(constxmlChar**)attributes
{
}
//УДБТъљтЁЃу┤ау╗ЊТЮЪТаЄУ«░ТЌХУДдтЈЉ
- (void)endElementLocalName:(constxmlChar*)localname
prefix:(constxmlChar*)prefix URI:(constxmlChar*)URI
{
}
//УДБТъљтЁЃу┤аСйЊТЌХУДдтЈЉ
- (void)charactersFound:(constxmlChar*)ch
len:(int)len
{
}
//У┐ћтЏъУДБТъљу╗ЊТъю
-(NSDictionary*)getResult{
return_root;
}
@end
тЈ»С╗ЦуюІтѕ░№╝їжЎцС║єgetAttributes тњїgetResult Тќ╣Т│Ћтцќ№╝їТѕЉС╗гжЃйТ▓АТюЅУ┐ЏУАїтЁХт«ЃТќ╣Т│Ћуџёт«ъуј░сђѓУ┐ЎТў»тЏаСИ║ Sax УДБТъљУиЪ Dom УДБТъљСИЇтљї№╝їжњѕт»╣СИЇтљїуџё XML ТќЄТАБтЙѕжџЙСй┐ућеуЏИтљїуџёжђ╗УЙЉУДБТъљ№╝їтЏаТГцТѕЉС╗гтЄєтцЄТіітЅЕСИІуџётєЁт«╣уЋЎу╗ЎтГљу▒╗ТЮЦт«ъуј░№╝їУ┐ЎТаиСИЇтљїуџёXML ТќЄТАБтЈ»С╗ЦжђџУ┐ЄСИЇтљїуџётГљу▒╗ТЮЦУ┐ЏУАїУДБТъљ№╝їУђїСИЇућетюеТ»ЈСИфтГљу▒╗СИГжЃйтєЎСИђжЂЇжѓБС║ЏТђфт╝ѓуџё C тЏъУ░ЃтЄйТЋ░тњїу╗ЊТъёСйЊтБ░Тўјсђѓ
ТѕЉС╗гУдЂУДБТъљуџёXML ТќЄТАБтЈ»УЃйТў»У┐ЎТаиуџё№╝џ
<root>
<List Name="тљїС║І">
<user name="t2" phone="13884831140"/>
<user name="t3" phone="15877103548"/>
<user name="t1" phone="13399459990"/>
</List>
<List Name="тЦйтЈІ">
<user name="f2" phone="13828831140"/>
<user name="f3" phone="15886103548"/>
<user name="f1" phone="13019459990"/>
</List>
</root>
С╣Ът░▒Тў»У»┤№╝їУ┐ЎТў»СИђСИфжђџУ«»тйЋу▒╗С╝╝уџёСИюУЦ┐сђѓжђџУ«»тйЋТііућхУ»ЮтЈиуаЂТїЅТђДУ┤етѕєТѕљСИЇтљїуџёу╗ё№╝їт░▒тЃЈWindows mobileТЎ║УЃйТЅІТю║СИіуџёуџёжђџУ«»тйЋ№╝їТііућхУ»ЮтЈиуаЂТїЅРђют«Хт║ГРђЮсђЂРђютЦйтЈІРђЮсђЂРђютљїС║ІРђЮуГЅУ┐ЏУАїтѕњтѕєсђѓ
ТѕЉС╗гТќ░т╗║СИђСИфBaseXmlParserуџётГљу▒╗ TelNoXmlParser №╝їУ«ЕУ┐ЎСИф TelNoXmlParser тј╗т«ъуј░ 3 СИфтЏъУ░ЃТќ╣Т│Ћ№╝џ
#import<Foundation/Foundation.h>
#import<libxml/tree.h>
#import"BaseXmlParser.h"
@interfaceTelNoXmlParser : BaseXmlParser {
BOOLloginSuccess;
NSMutableArray*groups,*members;
NSMutableDictionary*_group;
NSDictionary*_user;
}
@end
#import"TelNoXmlParser.h"
@implementationTelNoXmlParser
-(id)init{
if(self=[superinit]) {
//СИђСИфgroupsТЋ░у╗ё№╝їС╗БУАеС║єТЅђТюЅList
groups=[[NSMutableArrayalloc]init];
[_rootsetObject:groupsforKey:@"items"];
loginSuccess=YES;
}
returnself;
}
-(void)dealloc{
[_grouprelease],_group=nil;
[superdealloc];
}
//--------------------------------------------------------------//
#pragma mark -- libxml handler№╝їСИ╗УдЂТў»3СИфтЏъУ░ЃТќ╣Т│Ћ--
//--------------------------------------------------------------//
//УДБТъљтЁЃу┤ат╝ђтДІТаЄУ«░ТЌХУДдтЈЉ,тюеУ┐ЎжЄїтЈќтЁЃу┤ауџёт▒ъТђДтђ╝С╗ЦтЈіУ«Йуй«ТаЄт┐ЌтЈўжЄЈ
- (void)startElementLocalName:(constxmlChar*)localname
prefix:(constxmlChar*)prefix
URI:(constxmlChar*)URI
nb_namespaces:(int)nb_namespaces
namespaces:(constxmlChar**)namespaces
nb_attributes:(int)nb_attributes
nb_defaulted:(int)nb_defaultedslo
attributes:(constxmlChar**)attributes
{//ТѕЉС╗гтЁ│т┐Ѓ8СИфтЁЃу┤аТаЄуГЙ№╝їТЅђС╗ЦУ«Йуй«С║є8СИфТаЄт┐ЌСйЇ
// login_status
if(strncmp((char*)localname,"login_status",sizeof("login_status")) ==0) {
loginSuccess=NO;
return;
}
if(loginSuccess) {
// List
if(strncmp((char*)localname,"List",sizeof("List")) ==0) {
NSDictionary* atts=[selfgetAtributes:attributeswithSize:nb_attributes];//УјитЈќListуџёТЅђТюЅт▒ъТђД
_group=[[NSMutableDictionaryalloc]init];
members=[[NSMutableArrayalloc]init];
[_groupsetObject:membersforKey:@"members"];
[_groupsetObject:[[NSStringalloc]initWithString:(NSString*)[attsobjectForKey:@"Name"]]forKey:@"groupname"];
[groupsaddObject:_group];//ТііgroupтіатЁЦТЋ░у╗ё
return;
}
// user
if(strncmp((char*)localname,"user",sizeof("user")) ==0) {
NSDictionary* atts=[selfgetAtributes:attributeswithSize:nb_attributes];//УјитЈќListуџёТЅђТюЅт▒ъТђД
_user=[[NSDictionaryalloc]initWithDictionary:atts];
[membersaddObject:_user];
return;
}
}
}
//УДБТъљтЁЃу┤ау╗ЊТЮЪТаЄУ«░ТЌХУДдтЈЉ
- (void)endElementLocalName:(constxmlChar*)localname
prefix:(constxmlChar*)prefix URI:(constxmlChar*)URI
{
if(strncmp((char*)localname,"root",sizeof("root")) ==0){//rootу╗ЊТЮЪТЌХуй«login_statusТаЄт┐Ќ
if(loginSuccess) {
[_rootsetObject:@"true"forKey:@"login_status"];
}else{
[_rootsetObject:@"false"forKey:@"login_status"];
}
}
if(loginSuccess) {
//ТѕЉС╗гУ┐ўтЁ│т┐Ѓ<List>уџёу╗ЊТЮЪТаЄУ«░
if(strncmp((char*)localname,"List",sizeof("List")) ==0) {
[_grouprelease],_group=nil;//тЏъТћХ_groupт»╣У▒А№╝їС╗ЦСЙ┐жЄЇтцЇтѕЕуће
}elseif(strncmp((char*)localname,"user",sizeof("user")) ==0){
[_userrelease],_user=nil;//тЏъТћХ_userт»╣У▒А№╝їС╗ЦСЙ┐жЄЇтцЇтѕЕуће
}
}
}
//УДБТъљтЁЃу┤аСйЊТЌХУДдтЈЉ
- (void)charactersFound:(constxmlChar*)ch
len:(int)len
{
//Т▓АТюЅтЁЃу┤аСйЊжюђУдЂтЁ│т┐Ѓ
}
@end
ТјЦСИІТЮЦТѕЉС╗гуюІтдѓСйЋтюеViewController СИГСй┐ућесђѓ
тЏЏсђЂтюеUI СИГТхІУ»Ћ
тюеViewController СИГТћЙтЁЦСИђСИфТїЅжњ«тњїСИђСИф WebView№╝їтйЊуѓ╣тЄ╗ТїЅжњ«ТЌХ№╝їУ»иТ▒ѓhttpТюЇтіАтЎе№╝їУјитЈќжђџУ«»тйЋXML ТЋ░ТЇ«№╝їт╣ХУДБТъљСИ║ Dictionary т»╣У▒АсђѓТііУДБТъљу╗ЊТъюТўЙуц║тюе WebView СИГсђѓ
У┐ЎТў»ТїЅжњ«уџёtouch up inside С║ІС╗ХС╗БуаЂ№╝џ
-(IBAction)go{
if(_queue==nil){
_queue= [[NSOperationQueuealloc]init];
}
[buttonsetEnabled:NO];
[progresssetProgress:0];
[webViewloadHTMLString:@""baseURL:[NSURLURLWithString:URL]];
//Тъёжђаxmlparser
TelNoXmlParser* parser=[[TelNoXmlParseralloc]init];
//ТііselfТ│етєїСИ║delegate№╝їУ┐ЎТаиselfт┐Ёжюђт«ъуј░syncRequestParseStatusNofity:Тќ╣Т│Ћ,С╗ЦТјЦТћХstatusChangedТќ╣Т│Ћ
SyncRequestParseOperation* operation=[[SyncRequestParseOperationalloc ]
initWithURLString:URL
xmlParser:parser
delegate:self];
//ТііprogressУ«Йуй«СИ║progressDelegate№╝їУ┐ЎТаиС╝џТўЙуц║У┐Џт║д
[operationsetProgressDelegate:progress];
[parserrelease];// opertaionти▓retain№╝їтЈ»С╗Цrelease
[_queueaddOperation:operation];//т╝ђтДІтцёуљє
[operationrelease];//жўЪтѕЌти▓retain№╝їтЈ»С╗Цrelease№╝Џ
}
У┐ЎТў»т╝ѓТГЦТХѕТЂ»тѕ░УЙЙТЌХуџётцёуљєС╗БуаЂ№╝їтйЊТЋ░ТЇ«ТјЦТћХт«їТЌХ№╝їТѕЉС╗гТііУДБТъљу╗ЊТъютюеWebView СИГТўЙуц║№╝џ
//т«ъуј░statusChangedжђџуЪЦТќ╣Т│Ћ
-(void)syncRequestParseStatusNofity:(id)sender{
SyncRequestParseOperation* operation=(SyncRequestParseOperation*)sender;
intstatus=[operationstatus];
NSLog(@"status:%d",status);
if(status==kRequestStatusFinished){//тдѓТЋ░ТЇ«ТјЦТћХт«їТѕљ
[buttonsetEnabled:YES];
NSDictionary* d=[operationdata];
[webViewloadHTMLString:[ddescription]baseURL:[NSURLURLWithString:URL]];
}
}
У┐ЎТў»уеІт║ЈУ┐љУАїТЌХWebView ТўЙуц║ТЋѕТъю№╝џ
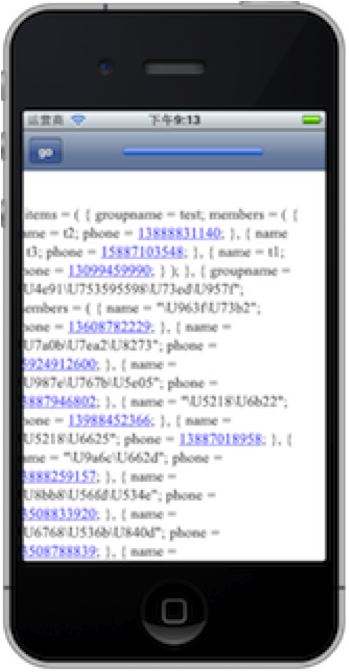
Т│еТёЈ№╝їтйЊxml ТќЄТАБТ»ћУЙЃтцДТЌХ№╝їWebView уџётєЁт«╣Тў»С╗јСИітѕ░СИІжђљТИљтѕиТќ░уџёсђѓ
У┐ЎТў»ТјДтѕХтЈ░УЙЊтЄ║№╝їтЈ»С╗ЦуюІтѕ░ТюЇтіАтЎетЊЇт║ћуџёТЋ░ТЇ«Тў»УбФтѕєТѕљтЙѕтцџТгАСИІУййуџё№╝џ


- 2011-07-02 18:24
- ТхЈУДѕ 632
- У»ёУ«║(0)
- ТЪЦуюІТЏ┤тцџ
тЈЉУАеУ»ёУ«║

уЏИтЁ│ТјеУЇљ
"ASIHTTPRequestтњїlibxmlу╗Њтљѕ№╝їт«ъуј░УЙ╣У»иТ▒ѓУЙ╣УДБТъљ "СИђТќЄТ║љС╗БуаЂ
ASIHTTPRequest+UITableViewт«ъуј░тцџСИфСИІУййС╗╗тіА№╝їТ▓Аућетѕ░жЄЇућеТю║тѕХ№╝їУ┐ўТюЅТ▓АТюЅт«ъуј░ТќГуѓ╣у╗ГУйй№╝їтЙѕу«ђтЇЋуџёСИђСИфdemo№╝їуЏИС┐АтѕЮтГдУђЁжЃйУЃйуюІТЄѓ№╝їУ┐ўтєЎС║єСИђС║ЏТ│ежЄісђѓ
тѕЕућеASIHttpRequestт«ъуј░т«бТѕиуФ»тљЉТюЇтіАтЎеуФ»У»иТ▒ѓуЎ╗жЎєжфїУ»Ђуџёуц║СЙІ тЇџт«бтЈѓУђЃ№╝џhttp://blog.csdn.net/dingxiaowei2013/article/details/12617203
iOS ASIHttpRequest У»иТ▒ѓhttps
ASIHTTPRequest,ућеС║јУјитЈќСИІУййтЈітЁХуЏИтЁ│тцёуљєСИјт║ћућеуџётіЪУЃйтЄйТЋ░
ASIHTTPRequestуйЉу╗юУ»иТ▒ѓжЏєтљѕ№╝їуЏ┤ТјЦт╝ЋтЁЦтѕ░жА╣уЏ«СИГСй┐ућесђѓ
Сй┐ућеASIт╝ђТ║љт║Њ№╝їт«ъуј░жўЪтѕЌСИІУййсђѓСй┐ућеUITableViewУ┐ЏУАїт▒Ћуц║
ASIHttpRequestТў»iOSт╝ђтЈЉт┐ЁтцЄуџёуйЉу╗юТЋ░ТЇ«У»иТ▒ѓтїЁ№╝їСй┐ућеТќ╣СЙ┐№╝їтћ»СИђуџёу╝║уѓ╣Тў»жЮъARCуџё№╝їжюђУдЂУ«Йуй«жА╣уЏ«СИГуџёжЮъARCу▒╗
тЁеуД░Тў»ASIHTTPRequest№╝їтцќтЈиРђюHTTPу╗ѕу╗ЊУђЁРђЮ№╝їтЈ»С╗Цт«ъуј░httpуйЉу╗юУ»иТ▒ѓ,тіЪУЃйтЇЂтѕєт╝║тцДсђѓ
тЈ»С╗ЦтЙѕтЦйуџёт║ћућетюе Mac OS X у│╗у╗Ътњї iOS т╣│тЈ░уџёт║ћућеуеІт║ЈСИГ№╝їASIHTTPRequest жђѓућеС║јтЪ║Тюгуџё HTTP У»иТ▒ѓ№╝їтњїтЪ║С║ј REST уџёТюЇтіАС╣ІжЌ┤уџёС║цС║њсђѓтЈ»ТЃюСйюУђЁТЌЕти▓тЂюТГбТЏ┤Тќ░№╝їТюЅСИђС║ЏТйютюеуџё BUG ТЌаС║║тј╗УДБтє│№╝їтЙѕтцџтЁгтЈИуџёТЌДжА╣уЏ«жЄїжЮбжЃй...
ТБђТЪЦASIHTTPRequestу▒╗уџёstartSynchronousТќ╣Т│Ћ№╝їТ│еТёЈСИІжЮбУ┐ЎТ«хС╗БуаЂ№╝ї if (![self isCancelled] && ![self complete]) { [self main]; while (!complete) { [[NSRunLoop currentRunLoop] runMode:[self ...
ASIHTTPRequestт«ъуј░УхёТ║љуџёСИІУйй№╝їТќГуѓ╣у╗ГС╝а
ASIHTTPRequestТў»у«ђтЇЋТўЊућеуџё№╝їт«Ѓт░ЂУБЁС║єCFNetwork APIсђѓСй┐тЙЌСИјWebТюЇтіАтЎежђџС┐АтЈўтЙЌТЏ┤у«ђтЇЋсђѓт«ЃТў»ућеObjective-Cу╝ќтєЎуџё№╝їтЈ»С╗ЦтюеMAC OS XтњїiPhoneт║ћућеСИГСй┐ућесђѓ...ASIFormDataRequestтГљу▒╗тЈ»С╗Цу«ђтЇЋуџёт«ъуј░ТЈљС║цТЋ░ТЇ«тњїТќЄС╗Хсђѓ
iosт╝ђтЈЉТАєТъХ ASIHttpRequest УхёТ║љТЮЦТ║љС║јуйЉСИі жЮътјЪтѕЏ
Сй┐ућеiOS SDKСИГуџёHTTPуйЉу╗юУ»иТ▒ѓAPI№╝їуЏИтйЊуџётцЇТЮѓ№╝їУ░ЃућетЙѕу╣Ђуљљ№╝їASIHTTPRequestт░▒Тў»СИђСИфт»╣CFNetwork APIУ┐ЏУАїС║єт░ЂУБЁ№╝їт╣ХСИћСй┐ућеУхиТЮЦжЮътИИу«ђтЇЋуџёСИђтЦЌAPI№╝їућеObjective-Cу╝ќтєЎ№╝їтЈ»С╗ЦтЙѕтЦйуџёт║ћућетюеMac OS Xу│╗у╗ЪтњїiOSт╣│тЈ░уџёт║ћуће...
asihttprequestТў»уЏ«тЅЇтЂџуД╗тіет╣│тЈ░ТИИТѕЈСИіТ»ћУЙЃСЙ┐ТЇиуџёhttpжђџС┐АуггСИЅТќ╣т║Њ